Use Reader in NOMAD
The reader functionality of pynxtools-spm package can be used in NOMAD if the package is installed together with the pynxtools package in NOMAD. For instructions on installing pynxtools-spm with NOMAD, please follow the installation guide.
Note
To produce this tutorial, we used the following version
NOMAD==v1.1.17,
pynxtools==v0.11.1,
pynxtools-spm==0.1.6.
Please ensure that you have the same version of NOMAD to get the same graphical user interface (GUI) as shown in the tutorial.
In later version of NOMAD, the GUI may change, but the overall functionality should remain similar.
Use Example Available in NOMAD
If the pynxtools-spm package is installed as a plugin a NOMAD, three demo examples for STS, STM, and AFM shall be available in NOMAD. Starting with these examples may help you to understand how to use pynxtools-spm readers' functionality in NOMAD.
These examples in NOMAD can be utilized to extend or modify the reader input files, such as modifying the ELN schema file or config file, to customize the reader functionality according to user requirements. For details, see How to Use the Reader guide.
Drag and Drop Example in NOMAD
The three examples above-mentioned may not be sufficient to store all data and metadata from an experiment. Therefore, you can modify the ELN schema file to structure and store metadata according to the application definitions. Below are a few steps to upload data in NOMAD using the drag-and-drop method:
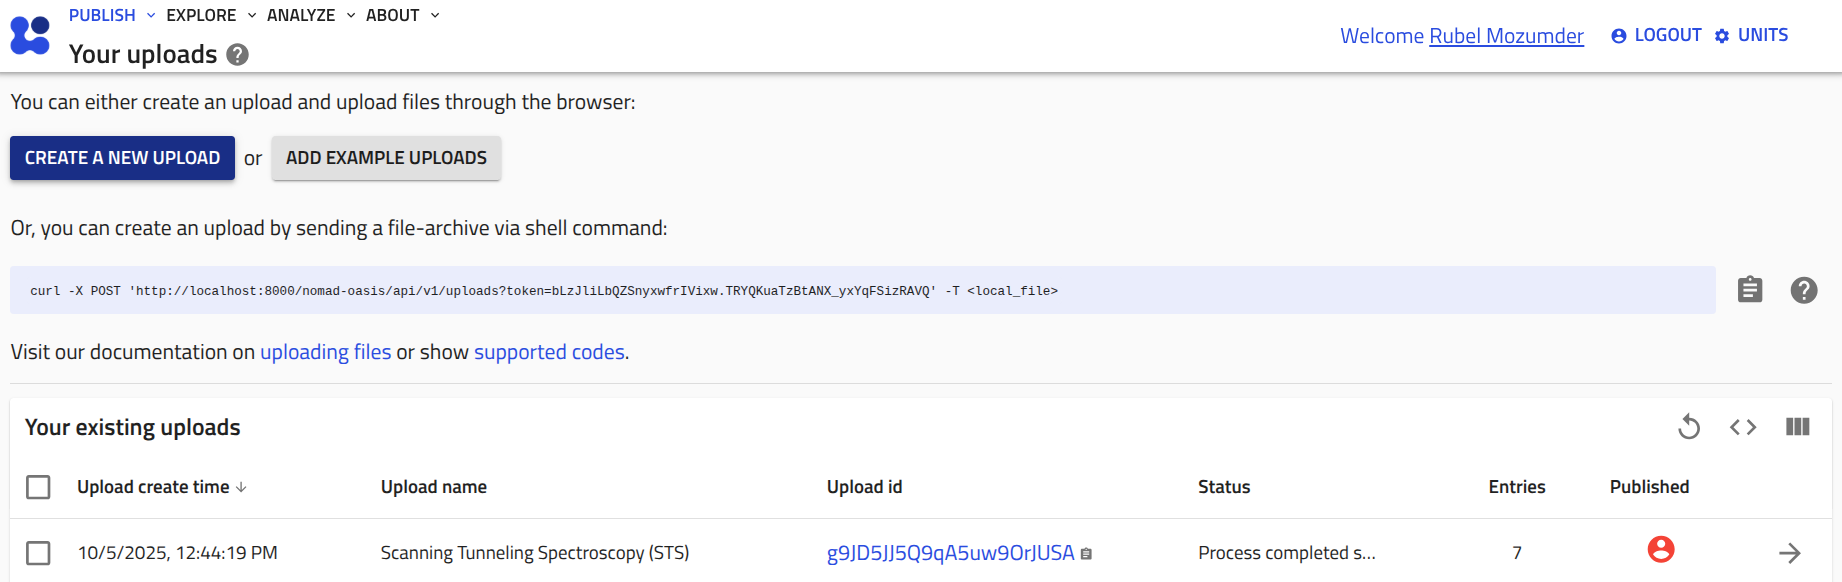
1. Create a NOMAD upload by clicking the CREATE A NEW UPLOAD button on NOMAD upload page.
2. Rename unnamed upload as desired, and drop the schema file (e.g., sts.schema.archive.yaml). NOMAD will create an entry.
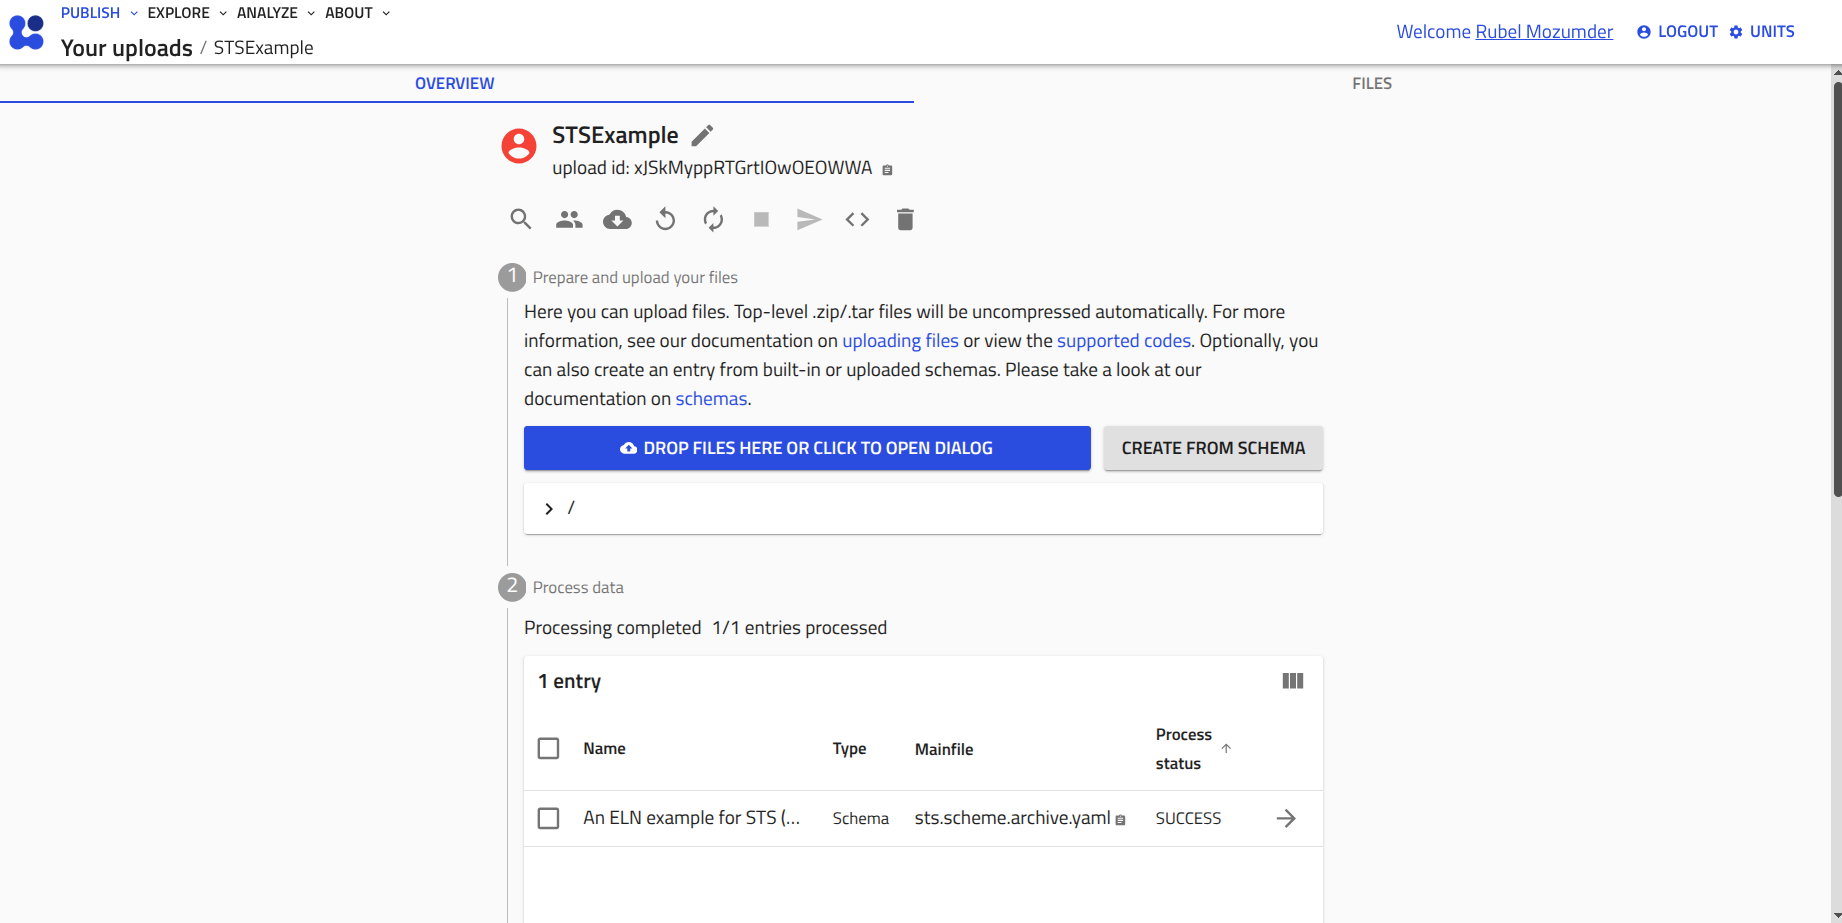
3. Create a NOMAD archive entry. Based on the newly uploaded schema file, you need to create the archive from the custom schema option as the uploaded schema file is not a built-in schema in NOMAD.
4. After creating an archive entry, the data section will immediately be expand for adding input data along with raw data files. By filling required metadata (e.g., the name of the nxdl, software and hardware specifications), the data can be saved in a NeXus file.