Deploying a NOMAD Oasis with the UniSysCat Plugin
Prerequisites
- A GitHub account, which can be created for free on github.com.
- Docker installed on your computer; installation instructions can be found on docs.docker.com/desktop/.
- The following instructions are for the Windows operating system. If you are using Linux, please refer to the detailed instructions here or read the NOMAD plugin documentation for all details on how to deploy the plugin on your NOMAD instance.
To install this plugin, follow part 4 of the FAIRmat tutorial 13 or read the NOMAD plugin documentation for all details on how to deploy the plugin on your NOMAD Oasis instance.
Outline
- Create a Docker image
- Add the plugin
- Update permissions
- Run the OASIS
1. Create a Docker image
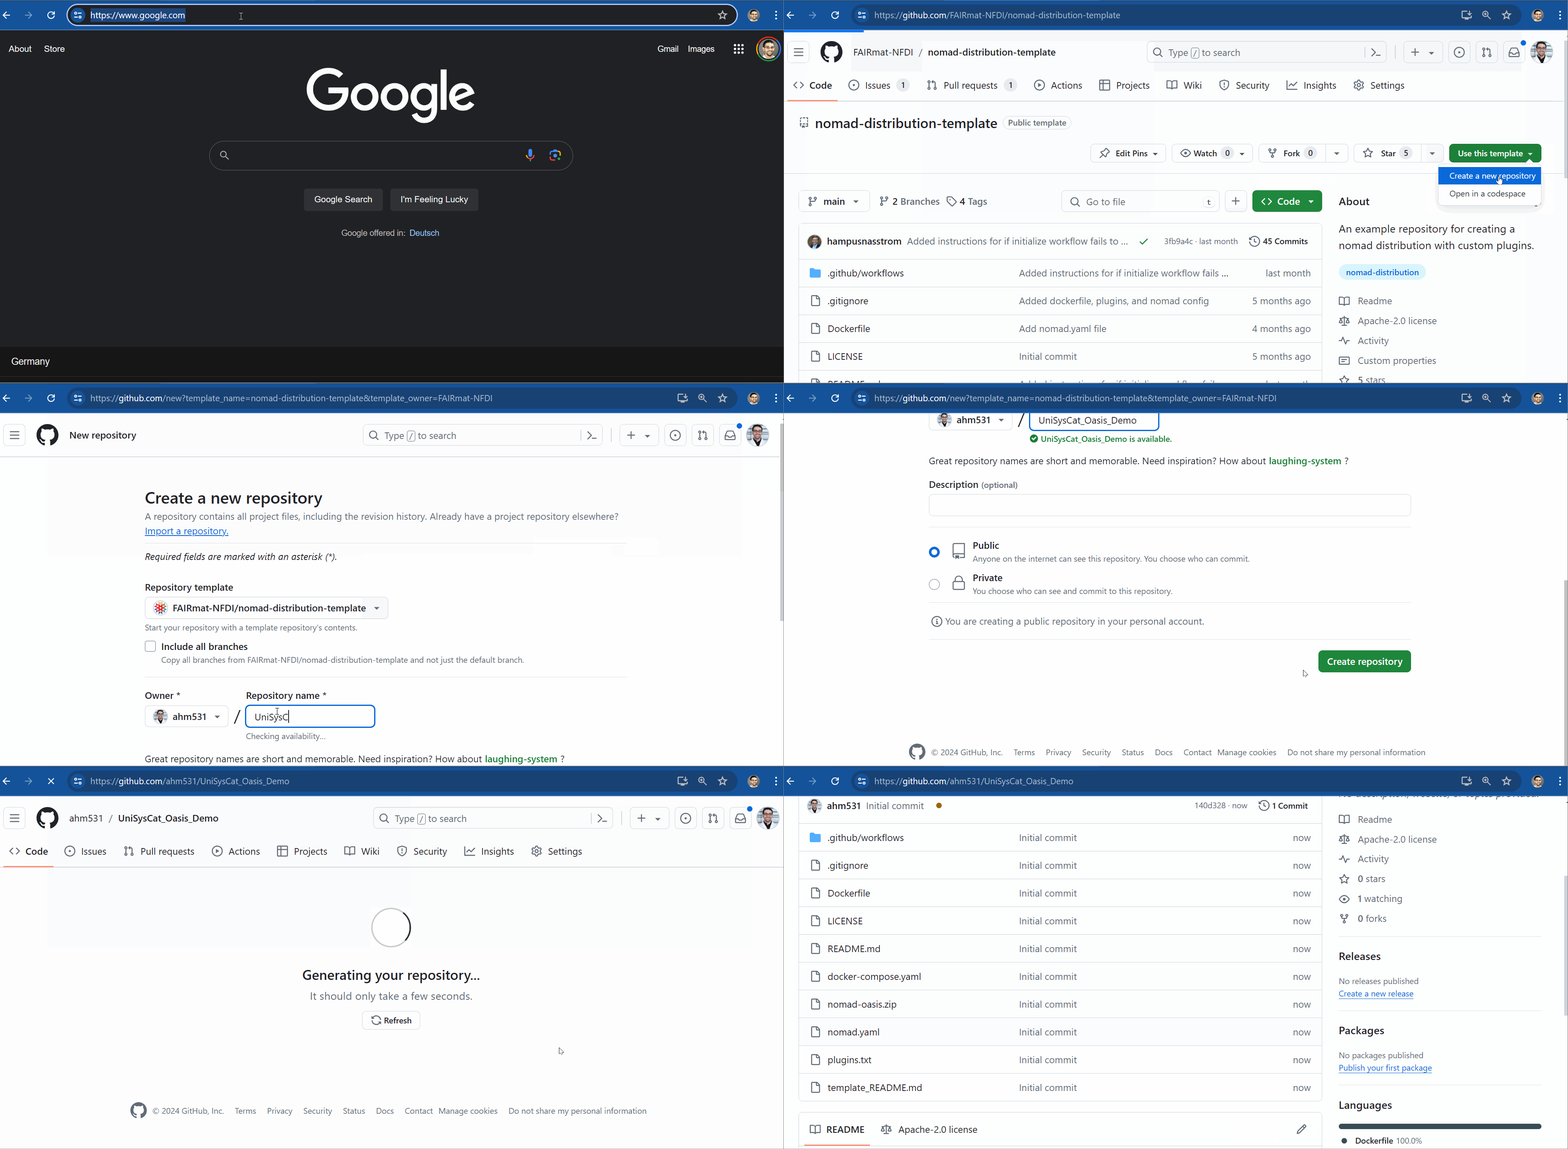
We will now create a custom Docker image for your OASIS. There is a GitHub template repository with predefined workflows that can be used for this at github.com/FAIRmat-NFDI/nomad-distribution-template.
To use the template, choose the "Create a new repository" option after pressing the green "Use this template" button in the upper right corner. Please note that you have to be logged into GitHub to see this option.
2. Add the plugin
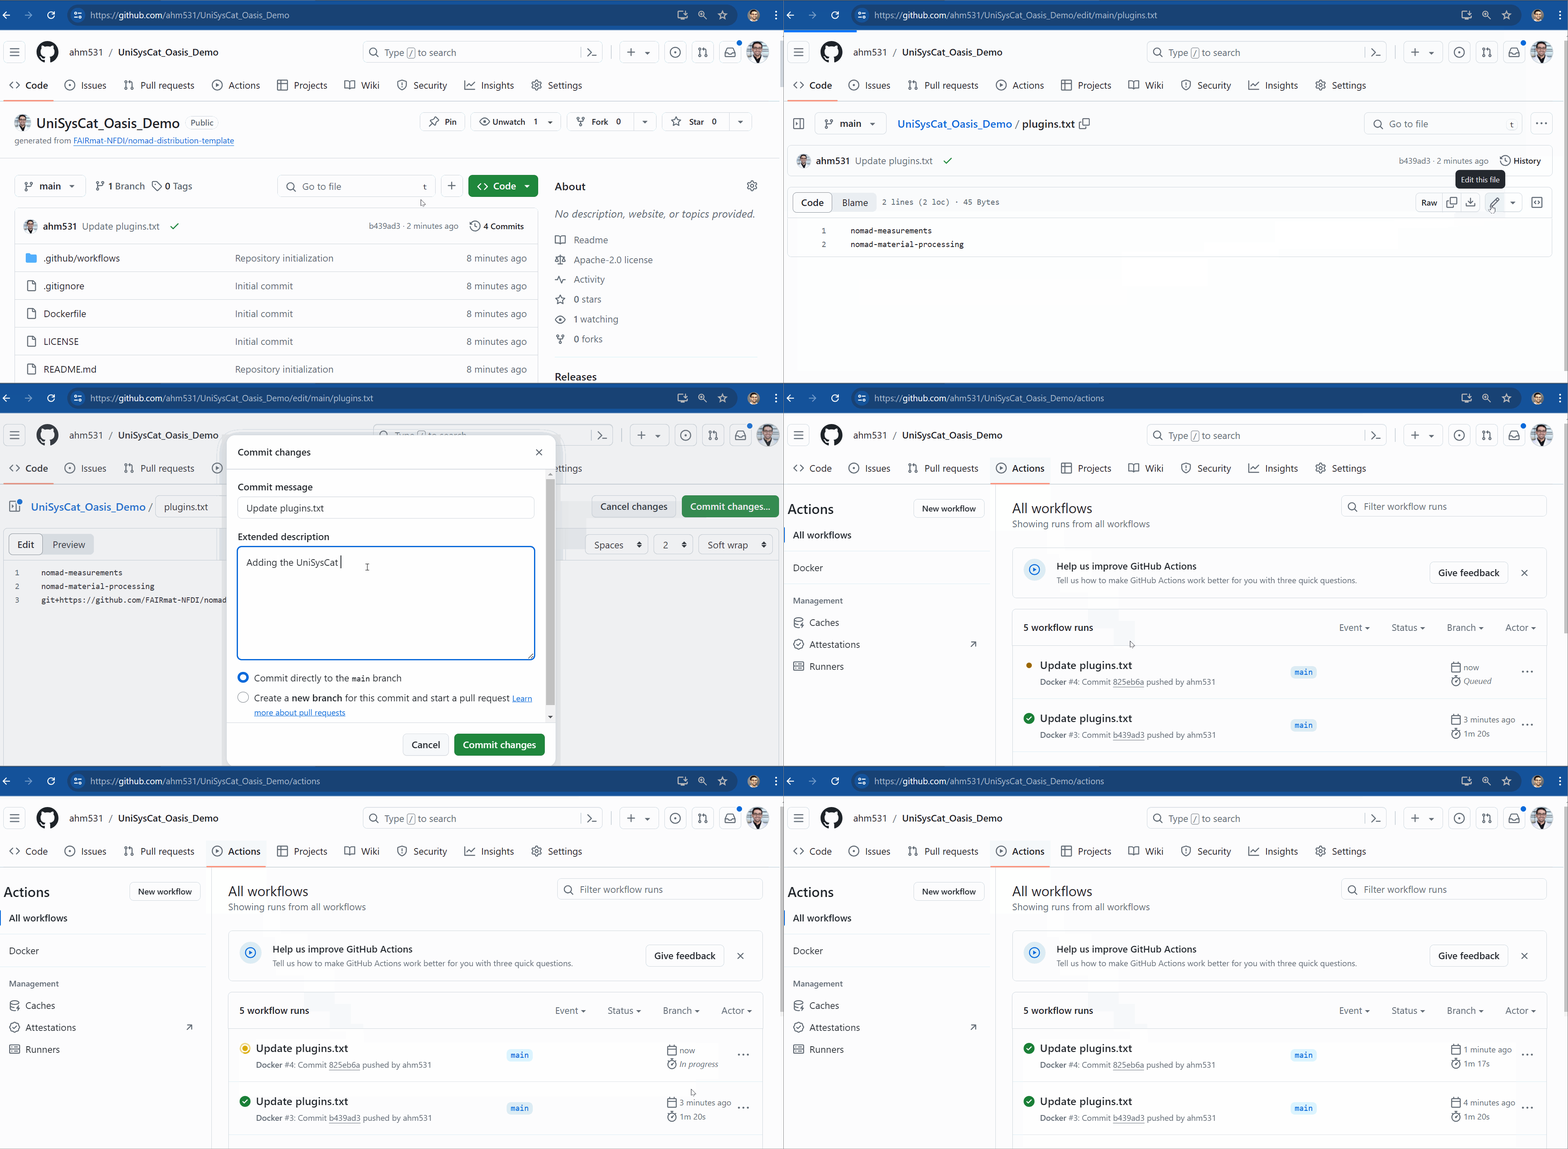
We will now add the plugin we developed as a demonstration for UniSysCat. To do this, we need to add the following line to the plugins.txt file:
We can do this directly from the GitHub web UI. Once this is saved, a workflow will run to create the image.
3. Update permissions
- Make sure you have Docker installed. Docker nowadays comes with
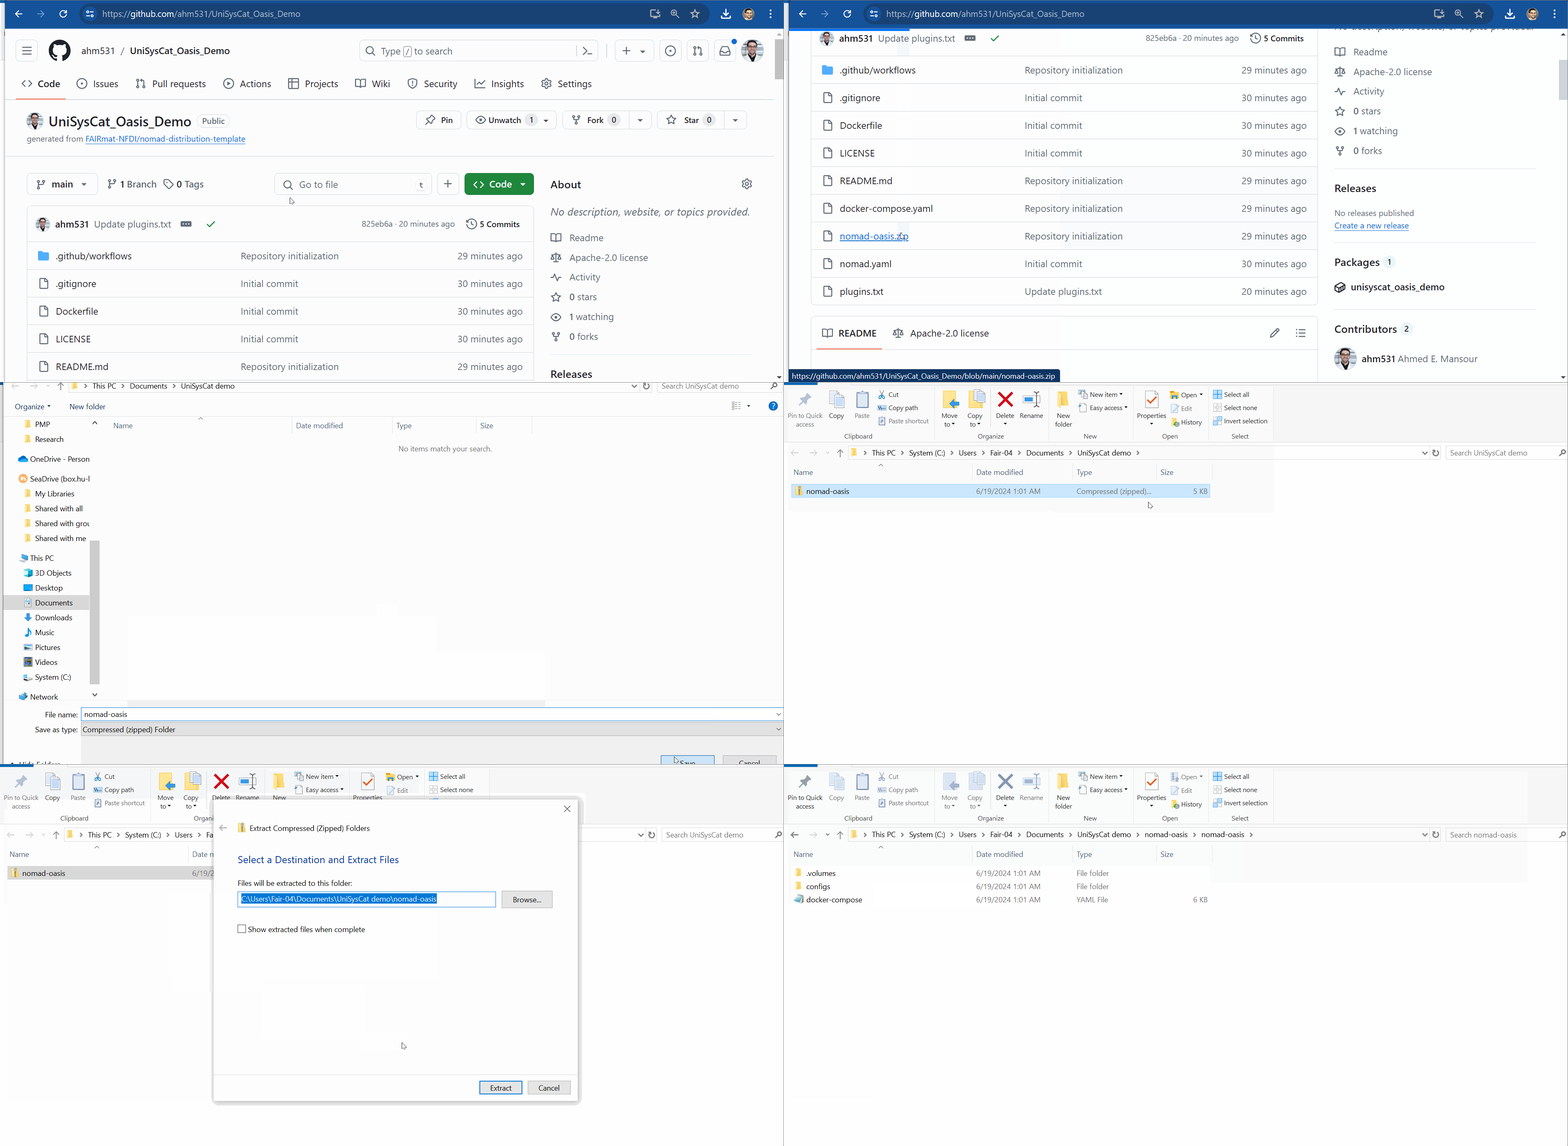
docker composebuilt in. Prior, you needed to install the stand-alone docker-compose. - Download the
nomad-oasis.ziparchive from your distribution repository to your computer. - Unzip the
nomad-oasis.zipfile.
- Open Docker Desktop.
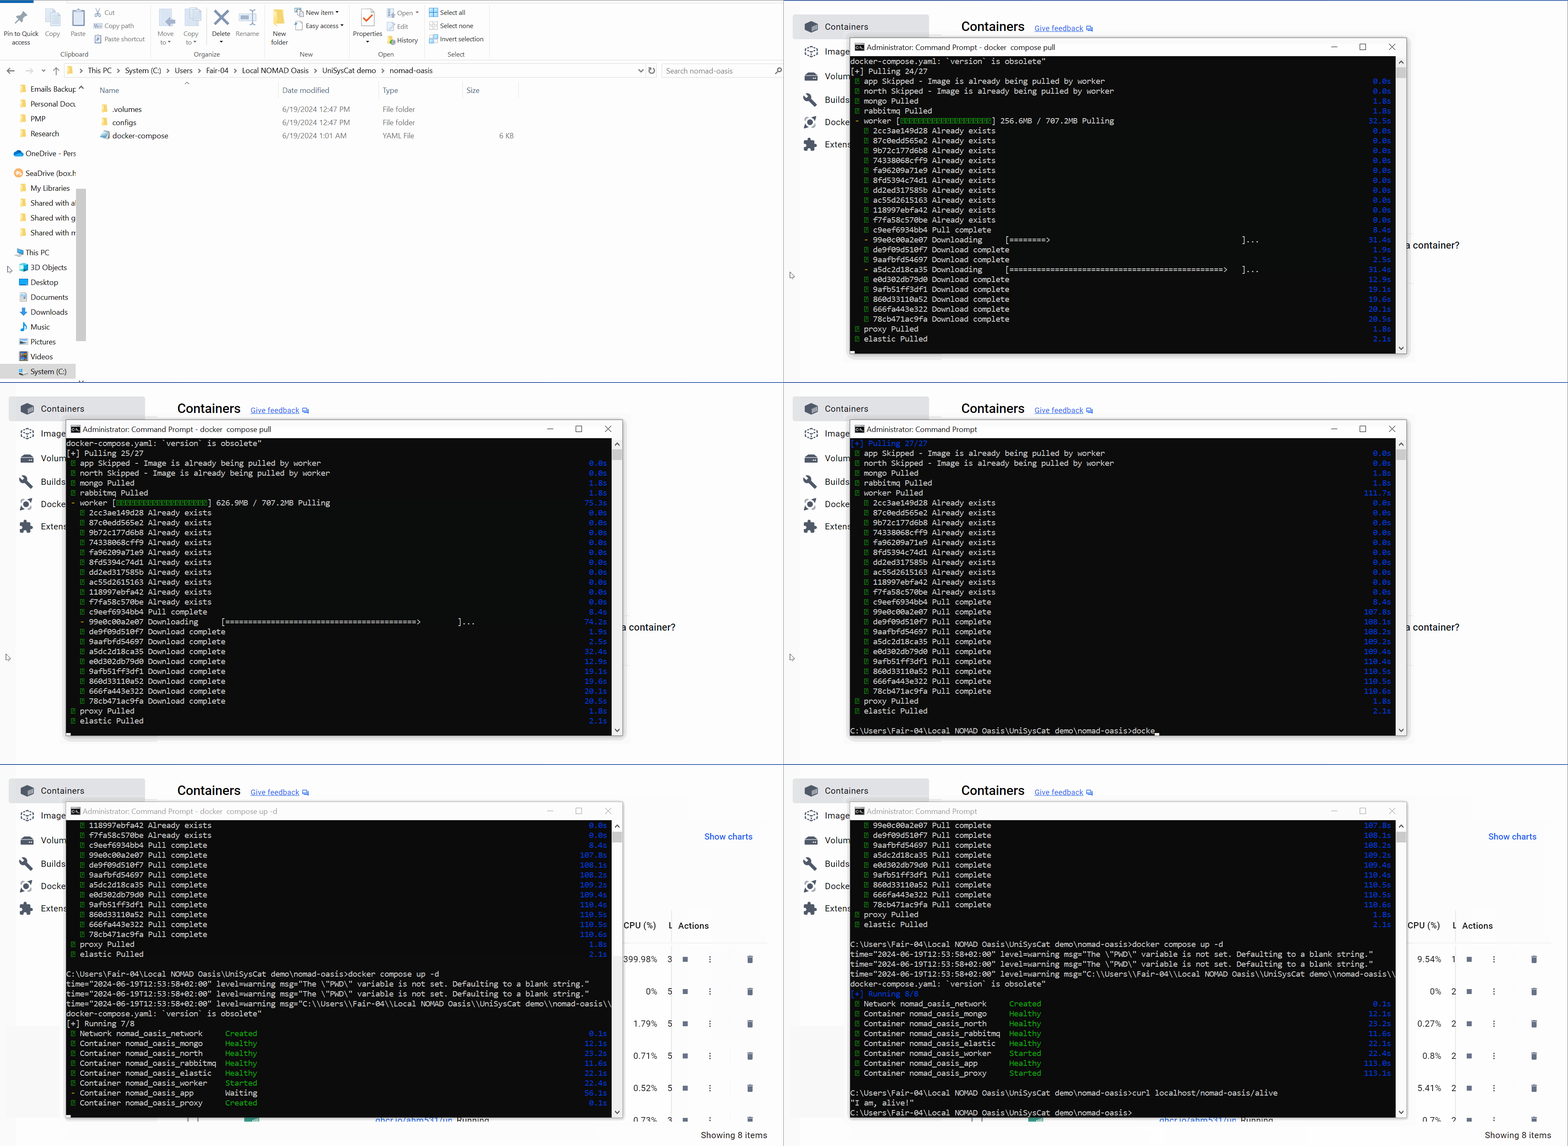
- Open the Windows command prompt and set the directory to the location where you have unzipped the nomad-oasis file. Below is an example for navigating to the directory where we saved the file. Make sure to change this to the directory you specified.
- Pull the images specified in the
docker-compose.yaml(retrieved from thenomad-oasis.zip). Note that the image needs to be public or you need to provide a PAT.
- Run it with Docker Compose in detached (
--detachor-d) mode.
- Optionally, you can now test that NOMAD is running with:
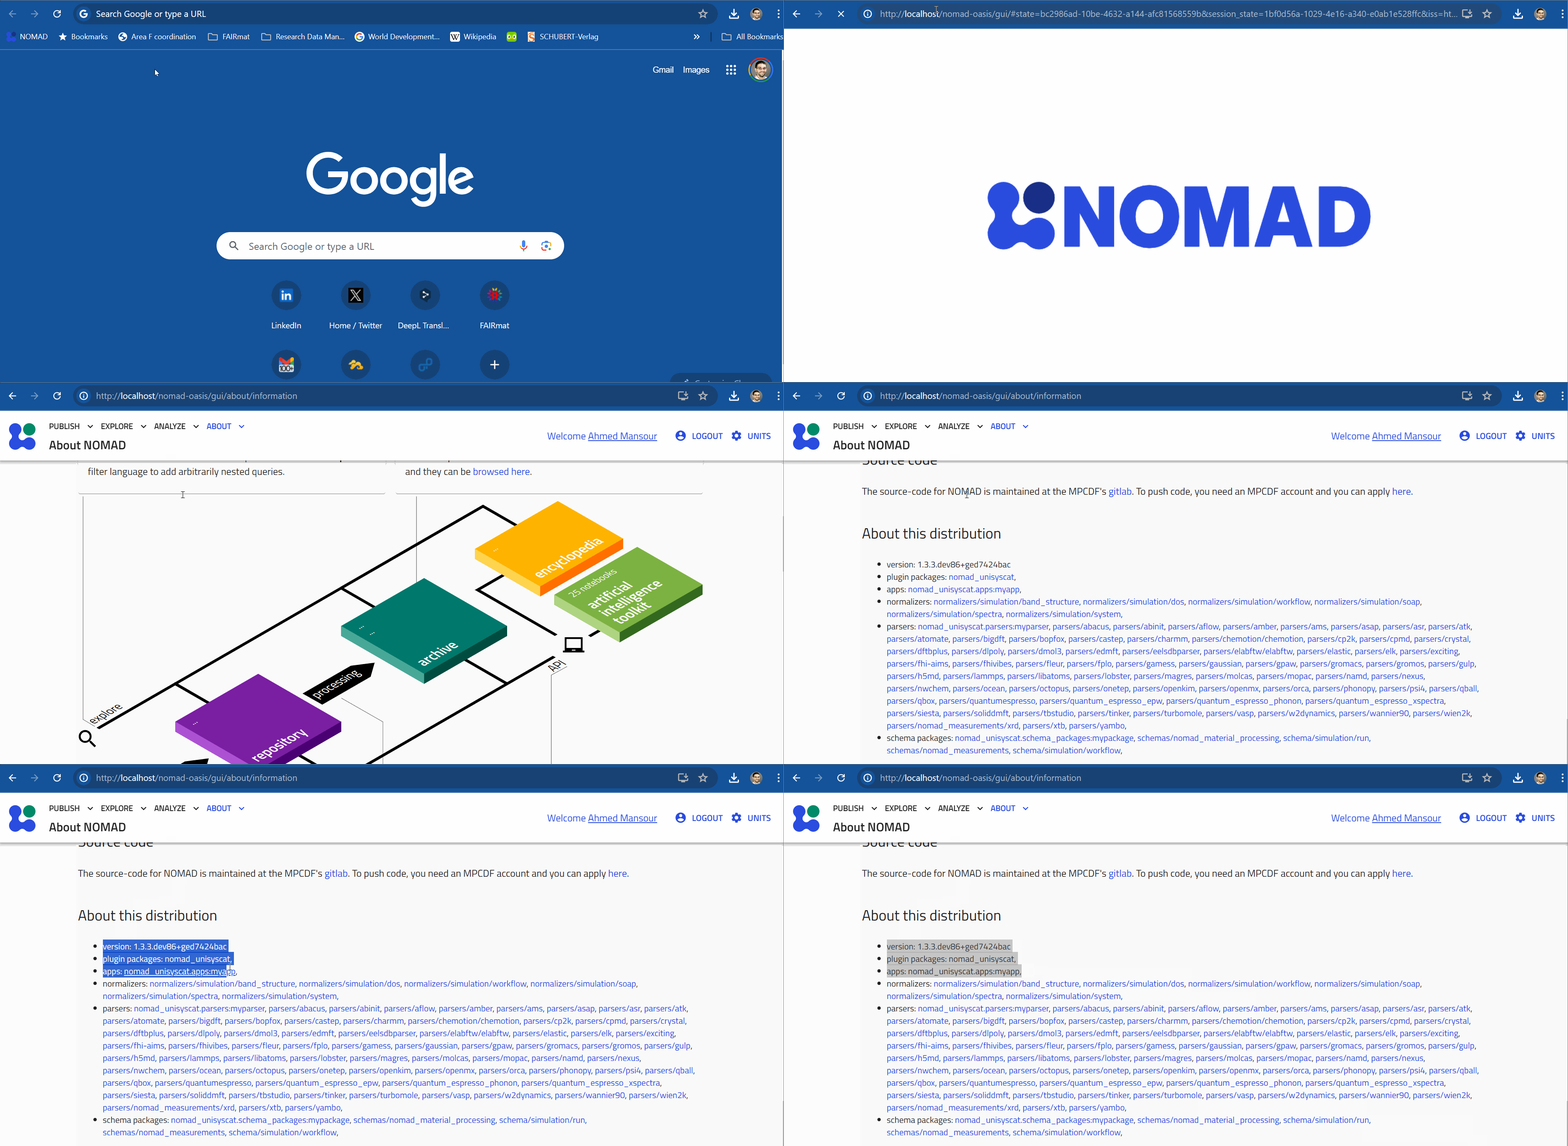
- Finally, open NOMAD Oasis in your browser to start using your new NOMAD Oasis.
Additional Instructions
If you already have a NOMAD Oasis, you just need to add the line:
to the plugin.txt in your NOMAD Oasis repository.